
Sentis
유니티에서 AI를 활용할 수 있게 해주는 Sentis를 분석해 보자.
https://unity.com/kr/products/sentis
Unity 센티스: Unity 런타임에서 AI 모델 사용 | Unity
Sentis는 게임 개발에서 AI 모델 혁신을 지원합니다. 사용자 디바이스에서 Unity Runtime을 통해 AI 모델을 실행하여 새롭고 다이내믹한 경험을 제공하세요.
unity.com
Sentis는 학습된 AI 모델을 실행할 수 있게 해주는 패키지이다.
Open Neural Network Exchange(ONNX) 형식으로 모델을 변환하면 사용할 수 있다고 한다.
예제를 살펴보며 어떻게 사용하는지 알아보고 huggigface에서 모델을 받아와 사용하는 게임을 만들어 보자.
https://huggingface.co/docs/hub/unity-sentis
Using Unity Sentis Models from Hugging Face
Using Unity Sentis Models from Hugging Face Unity 3D is one of the most popular game engines in the world. Unity Sentis is the inference engine that runs on Unity 2023 or above. It is an API that allows you to easily integrate and run neural network models
huggingface.co
MNIST
MNIST는 그림에서 문자를 인식하는 AI이다.
AI계의 hello world라고 알고 있다.
실제로 학부생 때 MNIST 모델을 만들고 학습시켜 본 경험이 있기 때문에 분석이 쉬울 거라 생각하여 골랐다.
예제 샘플은 방이 3~4개로 구성되어 있고 방에서 힌트를 찾아 비밀 번호를 패널에 마우스로 적으면 다음 방으로 넘어가는 형식의 게임이다.
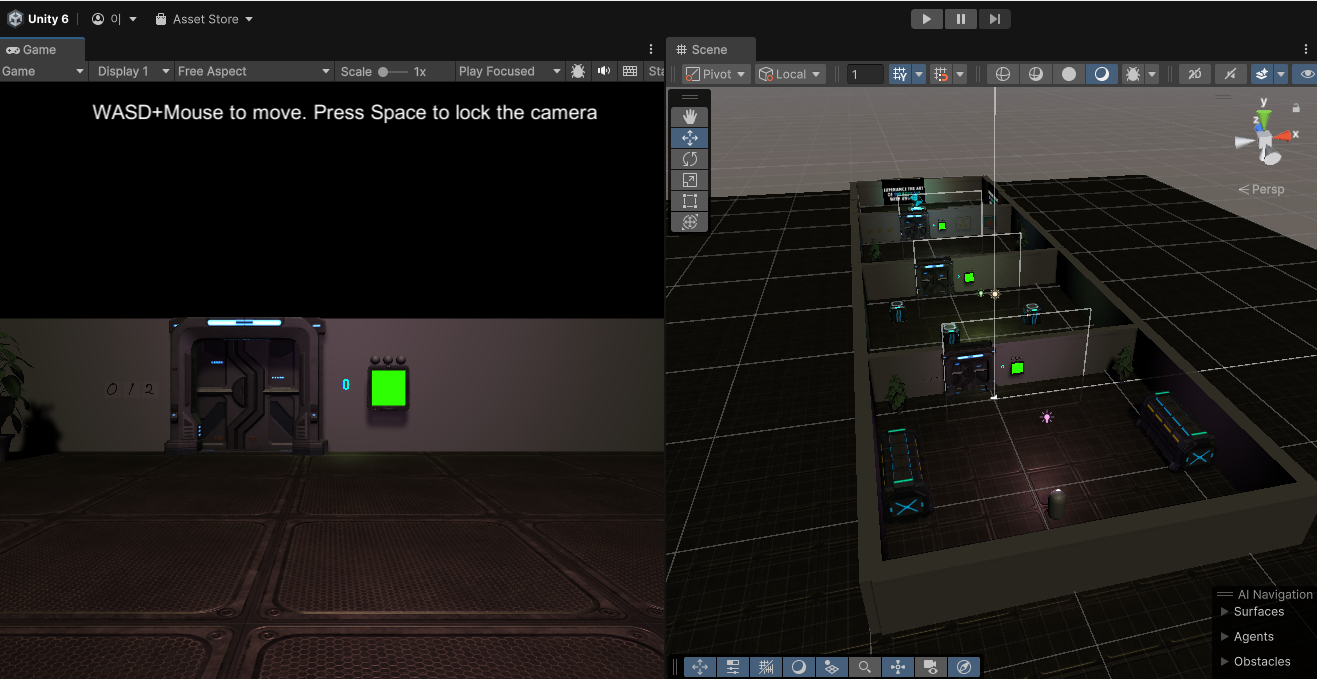
화면에 보이는 초록색이 글씨를 쓸 수 있는 패널이다.

게임은 Panel 위주로 분석하면 될 것 같다.
Panel
다음은 Panel의 전체 코드이다.
using System.Collections;
using System.Collections.Generic;
using UnityEngine;
using Unity.Sentis;
using UnityEngine.UI;
using System.Linq;

/*
 *  Manages Pannel
 *    - drawing things to the screen.
 *    - alarm animations.
 */
public class Panel : MonoBehaviour
{

    public GameObject screen;
    public Text predictionText, probabilityText;
    public MNISTEngine mnist;
    public GameObject alarm;
    public Light mainLight;
    public System.Action<Room, int, float> callback;


    // code pad where the digit is drawn onto
    Texture2D drawableTexture;
    const int imageWidth = 28; //width and height of input image
    float[] imageData = new float[imageWidth * imageWidth];
    byte[] zeroes = new byte[imageWidth * imageWidth * 3]; // blank screen
    Vector3 lastCoord; // last position of mouse on screen

    // digit recognition
    int predictedNumber;
    float probability;

    float timeOfLastEntry = float.MaxValue;
    float clearTime = 0.5f; // time digit is on screen before it is cleared
    Camera lookCamera;

    // alarm state
    enum STATE { NORMAL, ALARM };
    STATE state = STATE.NORMAL;
    float startTimeOfState = 0;
    float alarmPeriod = 2f; // number of seconds for alarm
    Color originalLightColor;

    // room state
    Room room;


    void Start()
    {
        lookCamera = Camera.main;

        // code pad texture which will be drawn into:
        drawableTexture = new Texture2D(imageWidth, imageWidth, TextureFormat.RGB24, false);
        drawableTexture.wrapMode = TextureWrapMode.Clamp;
        drawableTexture.filterMode = FilterMode.Point;

        ClearTexture();

        // emission map for glowing digits
        screen.GetComponent<Renderer>().material.SetTexture("_EmissionMap", drawableTexture);

        room = GetComponent<Room>();
        originalLightColor = mainLight.color;

        predictionText.text = "?";
    }

    public void SoundAlarm()
    {
        state = STATE.ALARM;
        alarm.GetComponent<AudioSource>().Play();
        startTimeOfState = Time.time;
    }

    void ClearTexture()
    {
        drawableTexture.LoadRawTextureData(zeroes);
        drawableTexture.Apply();
    }

    // Calls the neural network to get the probabilities of different digits then selects the most likely
    void Infer()
    {
        var probabilityAndIndex = mnist.GetMostLikelyDigitProbability(drawableTexture);

        probability = probabilityAndIndex.Item1;
        predictedNumber = probabilityAndIndex.Item2;
        predictionText.text = predictedNumber.ToString();
        if (probabilityText) probabilityText.text = Mathf.Floor(probability * 100) + "%";
    }

    // Draws a line on the panel by simply drawing a sequence of pixels
    void DrawLine(Vector3 startp, Vector3 endp)
    {
        int steps = (int)((endp - startp).magnitude * 2 + 1);
        for(float a = 0; a <= steps; a++)
        {
            float t = a * 1f / steps;
            DrawPoint(startp * (1 - t) + endp * t , 2, Color.white);
        }
    }

    // Draws either a single pixel or a 2x2 pixel for a thicker line
    void DrawPoint(Vector3 coord, int thickness, Color color)
    {
        //clamp the values so it doesn't touch the border
        float x = Mathf.Clamp(coord.x, thickness, imageWidth - thickness);
        float y = Mathf.Clamp(coord.y, thickness, imageWidth - thickness);

        switch (thickness)
        {
            case 1:
                DrawPixel((int)x, (int)y, color);
                break;
            case 2:
            default:
                int x0 = Mathf.Max(0, (int)(x - 0.5f));
                int x1 = Mathf.Min(imageWidth - 1, (int)(x + 0.5f));
                int y0 = Mathf.Max(0, (int)(y - 0.5f));
                int y1 = Mathf.Min(imageWidth - 1, (int)(y + 0.5f));
                DrawPixel(x0, y0, color);
                DrawPixel(x1, y0, color);
                DrawPixel(x0, y1, color);
                DrawPixel(x1, y1, color);
                break;
        }
    }

    void DrawPixel(int x,int y,Color color)
    {
        drawableTexture.SetPixel(x, y, color);
    }

    public void ScreenMouseDown(RaycastHit hit)
    {
        if (Game.instance && Game.instance.mode != Game.MODE.CONTROL) return;
        Vector2 uv = hit.textureCoord;
        Vector3 coords = uv * imageWidth;
        lastCoord = coords;
        timeOfLastEntry = Time.time;
    }

    public void ScreenGetMouse(RaycastHit hit)
    {
        if (Game.instance &&  Game.instance.mode != Game.MODE.CONTROL) return;
        Vector2 uv = hit.textureCoord;
        Vector3 coords = uv * imageWidth;

        DrawLine(lastCoord, coords);
        lastCoord = coords;
        drawableTexture.Apply();

        timeOfLastEntry = Time.time;
        // Run the inference every frame since it is very fast
        Infer();
    }

    void Update()
    {
        if (state == STATE.ALARM)
        {
            float t = Time.time - startTimeOfState;
            if (t < alarmPeriod)
            {
                AnimateAlarm(t);
            }
            else
            {
                StopAlarm();
            }
        }

        // After a certain time we want to clear the panel:
        if ((Time.time - timeOfLastEntry) > clearTime)
        {
            if (callback != null) callback(room, predictedNumber, probability);
            ClearTexture();
            timeOfLastEntry = float.MaxValue;
        }

    }

    void AnimateAlarm(float t)
    {
        Color lightColor = new Color(Mathf.Pow(Mathf.Cos(t * Mathf.PI * 4), 2), 0, 0);
        for (int i = 0; i < room.lights.Length; i++)
        {
            room.lights[i].GetComponent<Renderer>().material.SetColor("_EmissionColor", lightColor);
        }
        mainLight.color = lightColor;
    }

    void StopAlarm()
    {
        alarm.GetComponent<AudioSource>().Stop();
        state = STATE.NORMAL;
        mainLight.color = originalLightColor;
        for (int i = 0; i < room.lights.Length; i++)
        {
            room.lights[i].GetComponent<Renderer>().material.SetColor("_EmissionColor", Color.black);
        }
        predictionText.text = "?";
    }
}Panel의 역할은 글씨를 쓰는 역할과 이를 ai 모델에 전달하여 인식된 글자를 받아오는 역할이다.
우선 글씨를 쓰는 것부터 알아보자.
void Start()
{
    lookCamera = Camera.main;

    // code pad texture which will be drawn into:
    drawableTexture = new Texture2D(imageWidth, imageWidth, TextureFormat.RGB24, false);
    drawableTexture.wrapMode = TextureWrapMode.Clamp;
    drawableTexture.filterMode = FilterMode.Point;

    ClearTexture();

    // emission map for glowing digits
    screen.GetComponent<Renderer>().material.SetTexture("_EmissionMap", drawableTexture);

    room = GetComponent<Room>();
    originalLightColor = mainLight.color;

    predictionText.text = "?";
}

void ClearTexture()
{
    drawableTexture.LoadRawTextureData(zeroes);
    drawableTexture.Apply();
}Panel이 시작되면 drawableTexture를 새로 생성한다.
그리고 texture를 초기화해 준다.
LoadRawTextureData함수는 매개변수로 전달된 배열을 텍스처에 적용한다.
byte[] zeroes = new byte[imageWidth * imageWidth * 3]; // blank screenscreen.GetComponent<Renderer>().material.SetTexture("_EmissionMap", drawableTexture);초기화한 drawbleTexture를 screen의 emissionMap으로 적용한다.
즉, zeros는 모든 요소가 0이기 때문에 텍스처가 모두 0으로 적용될 것이고 검은색으로 보이게 된다.
초기화는 완료했고 마우스로 그림을 어떻게 그리는지 확인하려 했는데 Panel에서는 이를 감지하는 코드가 없었다.
살펴보니 MINSTEngine에서 감지하고 있었다.
void Update()
{
    if (Input.GetMouseButtonDown(0))
    {
        MouseClicked();
    }
    else if (Input.GetMouseButton(0))
    {
        MouseIsDown();
    }
}

// Detect the mouse click and send the info to the panel class
void MouseClicked()
{
    Ray ray = lookCamera.ScreenPointToRay(Input.mousePosition);
    if (Physics.Raycast(ray, out RaycastHit hit) && hit.collider.name == "Screen")
    {
        Panel panel = hit.collider.GetComponentInParent<Panel>();
        if (!panel) return;
        panel.ScreenMouseDown(hit);
    }
}

// Detect if the mouse is down and sent the info to the panel class
void MouseIsDown()
{
    Ray ray = lookCamera.ScreenPointToRay(Input.mousePosition);
    if (Physics.Raycast(ray, out RaycastHit hit) && hit.collider.name == "Screen")
    {
        Panel panel = hit.collider.GetComponentInParent<Panel>();
        if (!panel) return;
        panel.ScreenGetMouse(hit);
    }
}카메라를 통해 ray를 쏘고 hit에서 panel을 읽어와 draw를 하는 것 같다.
두 가지 이벤트를 처리하는데 Click과 Down이벤트이다.
클릭하면 draw를 시작하고 down에서 경로를 트래킹해 화면에 출력하는 것 같다.
public void ScreenMouseDown(RaycastHit hit)
{
    if (Game.instance && Game.instance.mode != Game.MODE.CONTROL) return;
    Vector2 uv = hit.textureCoord;
    Vector3 coords = uv * imageWidth;
    lastCoord = coords;
    timeOfLastEntry = Time.time;
}

public void ScreenGetMouse(RaycastHit hit)
{
    if (Game.instance &&  Game.instance.mode != Game.MODE.CONTROL) return;
    Vector2 uv = hit.textureCoord;
    Vector3 coords = uv * imageWidth;

    DrawLine(lastCoord, coords);
    lastCoord = coords;
    drawableTexture.Apply();

    timeOfLastEntry = Time.time;
    // Run the inference every frame since it is very fast
    Infer();
}hit결과에서 textureCoord를 받아와서 실제 coord를 계산한다.
그리고 DrawLine으로 선을 그린다.
void DrawLine(Vector3 startp, Vector3 endp)
{
    int steps = (int)((endp - startp).magnitude * 2 + 1);
    for(float a = 0; a <= steps; a++)
    {
        float t = a * 1f / steps;
        DrawPoint(startp * (1 - t) + endp * t , 2, Color.white);
    }
}DrawLine은 시작점과 끝점을 여러 step으로 나누고 각 구간의 색을 DrawPoint 함수를 통해 변경한다.
void DrawPoint(Vector3 coord, int thickness, Color color)
{
    //clamp the values so it doesn't touch the border
    float x = Mathf.Clamp(coord.x, thickness, imageWidth - thickness);
    float y = Mathf.Clamp(coord.y, thickness, imageWidth - thickness);

    switch (thickness)
    {
        case 1:
            DrawPixel((int)x, (int)y, color);
            break;
        case 2:
        default:
            int x0 = Mathf.Max(0, (int)(x - 0.5f));
            int x1 = Mathf.Min(imageWidth - 1, (int)(x + 0.5f));
            int y0 = Mathf.Max(0, (int)(y - 0.5f));
            int y1 = Mathf.Min(imageWidth - 1, (int)(y + 0.5f));
            DrawPixel(x0, y0, color);
            DrawPixel(x1, y0, color);
            DrawPixel(x0, y1, color);
            DrawPixel(x1, y1, color);
            break;
    }
}선의 두께에 따라 색이 칠해질 pixel을 계산하게 된다.
실질적으로 pixel의 색깔을 적용하는 함수는 DrawPixel이다.
void DrawPixel(int x,int y,Color color)
{
    drawableTexture.SetPixel(x, y, color);
}검은색(0)으로 초기화했던 drawbleTexture를 white로 변경하게 되면 밑에 있던 텍스처가 보이게 된다.
패널의 경우 초기 텍스처가 초록색으로 설정되어 있고 drawbleTexture가 이를 덮고 있는 형태라 사실 실제로 선을 그리는 게 아니라 선으로 검은색을 지워내는 것과 동일하다.
선을 그리는 로직을 살펴봤으니 이를 MNIST를 통해 숫자로 인식하는 로직은 다음 포스트에서 알아보자.
Sentis
유니티에서 AI를 활용할 수 있게 해주는 Sentis를 분석해 보자.
https://unity.com/kr/products/sentis
Unity 센티스: Unity 런타임에서 AI 모델 사용 | Unity
Sentis는 게임 개발에서 AI 모델 혁신을 지원합니다. 사용자 디바이스에서 Unity Runtime을 통해 AI 모델을 실행하여 새롭고 다이내믹한 경험을 제공하세요.
unity.com
Sentis는 학습된 AI 모델을 실행할 수 있게 해주는 패키지이다.
Open Neural Network Exchange(ONNX) 형식으로 모델을 변환하면 사용할 수 있다고 한다.
예제를 살펴보며 어떻게 사용하는지 알아보고 huggigface에서 모델을 받아와 사용하는 게임을 만들어 보자.
https://huggingface.co/docs/hub/unity-sentis
Using Unity Sentis Models from Hugging Face
Using Unity Sentis Models from Hugging Face Unity 3D is one of the most popular game engines in the world. Unity Sentis is the inference engine that runs on Unity 2023 or above. It is an API that allows you to easily integrate and run neural network models
huggingface.co
MNIST
MNIST는 그림에서 문자를 인식하는 AI이다.
AI계의 hello world라고 알고 있다.
실제로 학부생 때 MNIST 모델을 만들고 학습시켜 본 경험이 있기 때문에 분석이 쉬울 거라 생각하여 골랐다.
예제 샘플은 방이 3~4개로 구성되어 있고 방에서 힌트를 찾아 비밀 번호를 패널에 마우스로 적으면 다음 방으로 넘어가는 형식의 게임이다.
화면에 보이는 초록색이 글씨를 쓸 수 있는 패널이다.
게임은 Panel 위주로 분석하면 될 것 같다.
Panel
다음은 Panel의 전체 코드이다.
using System.Collections;
using System.Collections.Generic;
using UnityEngine;
using Unity.Sentis;
using UnityEngine.UI;
using System.Linq;

/*
 *  Manages Pannel
 *    - drawing things to the screen.
 *    - alarm animations.
 */
public class Panel : MonoBehaviour
{

    public GameObject screen;
    public Text predictionText, probabilityText;
    public MNISTEngine mnist;
    public GameObject alarm;
    public Light mainLight;
    public System.Action<Room, int, float> callback;


    // code pad where the digit is drawn onto
    Texture2D drawableTexture;
    const int imageWidth = 28; //width and height of input image
    float[] imageData = new float[imageWidth * imageWidth];
    byte[] zeroes = new byte[imageWidth * imageWidth * 3]; // blank screen
    Vector3 lastCoord; // last position of mouse on screen

    // digit recognition
    int predictedNumber;
    float probability;

    float timeOfLastEntry = float.MaxValue;
    float clearTime = 0.5f; // time digit is on screen before it is cleared
    Camera lookCamera;

    // alarm state
    enum STATE { NORMAL, ALARM };
    STATE state = STATE.NORMAL;
    float startTimeOfState = 0;
    float alarmPeriod = 2f; // number of seconds for alarm
    Color originalLightColor;

    // room state
    Room room;


    void Start()
    {
        lookCamera = Camera.main;

        // code pad texture which will be drawn into:
        drawableTexture = new Texture2D(imageWidth, imageWidth, TextureFormat.RGB24, false);
        drawableTexture.wrapMode = TextureWrapMode.Clamp;
        drawableTexture.filterMode = FilterMode.Point;

        ClearTexture();

        // emission map for glowing digits
        screen.GetComponent<Renderer>().material.SetTexture("_EmissionMap", drawableTexture);

        room = GetComponent<Room>();
        originalLightColor = mainLight.color;

        predictionText.text = "?";
    }

    public void SoundAlarm()
    {
        state = STATE.ALARM;
        alarm.GetComponent<AudioSource>().Play();
        startTimeOfState = Time.time;
    }

    void ClearTexture()
    {
        drawableTexture.LoadRawTextureData(zeroes);
        drawableTexture.Apply();
    }

    // Calls the neural network to get the probabilities of different digits then selects the most likely
    void Infer()
    {
        var probabilityAndIndex = mnist.GetMostLikelyDigitProbability(drawableTexture);

        probability = probabilityAndIndex.Item1;
        predictedNumber = probabilityAndIndex.Item2;
        predictionText.text = predictedNumber.ToString();
        if (probabilityText) probabilityText.text = Mathf.Floor(probability * 100) + "%";
    }

    // Draws a line on the panel by simply drawing a sequence of pixels
    void DrawLine(Vector3 startp, Vector3 endp)
    {
        int steps = (int)((endp - startp).magnitude * 2 + 1);
        for(float a = 0; a <= steps; a++)
        {
            float t = a * 1f / steps;
            DrawPoint(startp * (1 - t) + endp * t , 2, Color.white);
        }
    }

    // Draws either a single pixel or a 2x2 pixel for a thicker line
    void DrawPoint(Vector3 coord, int thickness, Color color)
    {
        //clamp the values so it doesn't touch the border
        float x = Mathf.Clamp(coord.x, thickness, imageWidth - thickness);
        float y = Mathf.Clamp(coord.y, thickness, imageWidth - thickness);

        switch (thickness)
        {
            case 1:
                DrawPixel((int)x, (int)y, color);
                break;
            case 2:
            default:
                int x0 = Mathf.Max(0, (int)(x - 0.5f));
                int x1 = Mathf.Min(imageWidth - 1, (int)(x + 0.5f));
                int y0 = Mathf.Max(0, (int)(y - 0.5f));
                int y1 = Mathf.Min(imageWidth - 1, (int)(y + 0.5f));
                DrawPixel(x0, y0, color);
                DrawPixel(x1, y0, color);
                DrawPixel(x0, y1, color);
                DrawPixel(x1, y1, color);
                break;
        }
    }

    void DrawPixel(int x,int y,Color color)
    {
        drawableTexture.SetPixel(x, y, color);
    }

    public void ScreenMouseDown(RaycastHit hit)
    {
        if (Game.instance && Game.instance.mode != Game.MODE.CONTROL) return;
        Vector2 uv = hit.textureCoord;
        Vector3 coords = uv * imageWidth;
        lastCoord = coords;
        timeOfLastEntry = Time.time;
    }

    public void ScreenGetMouse(RaycastHit hit)
    {
        if (Game.instance &&  Game.instance.mode != Game.MODE.CONTROL) return;
        Vector2 uv = hit.textureCoord;
        Vector3 coords = uv * imageWidth;

        DrawLine(lastCoord, coords);
        lastCoord = coords;
        drawableTexture.Apply();

        timeOfLastEntry = Time.time;
        // Run the inference every frame since it is very fast
        Infer();
    }

    void Update()
    {
        if (state == STATE.ALARM)
        {
            float t = Time.time - startTimeOfState;
            if (t < alarmPeriod)
            {
                AnimateAlarm(t);
            }
            else
            {
                StopAlarm();
            }
        }

        // After a certain time we want to clear the panel:
        if ((Time.time - timeOfLastEntry) > clearTime)
        {
            if (callback != null) callback(room, predictedNumber, probability);
            ClearTexture();
            timeOfLastEntry = float.MaxValue;
        }

    }

    void AnimateAlarm(float t)
    {
        Color lightColor = new Color(Mathf.Pow(Mathf.Cos(t * Mathf.PI * 4), 2), 0, 0);
        for (int i = 0; i < room.lights.Length; i++)
        {
            room.lights[i].GetComponent<Renderer>().material.SetColor("_EmissionColor", lightColor);
        }
        mainLight.color = lightColor;
    }

    void StopAlarm()
    {
        alarm.GetComponent<AudioSource>().Stop();
        state = STATE.NORMAL;
        mainLight.color = originalLightColor;
        for (int i = 0; i < room.lights.Length; i++)
        {
            room.lights[i].GetComponent<Renderer>().material.SetColor("_EmissionColor", Color.black);
        }
        predictionText.text = "?";
    }
}
Panel의 역할은 글씨를 쓰는 역할과 이를 ai 모델에 전달하여 인식된 글자를 받아오는 역할이다.
우선 글씨를 쓰는 것부터 알아보자.
void Start()
{
    lookCamera = Camera.main;

    // code pad texture which will be drawn into:
    drawableTexture = new Texture2D(imageWidth, imageWidth, TextureFormat.RGB24, false);
    drawableTexture.wrapMode = TextureWrapMode.Clamp;
    drawableTexture.filterMode = FilterMode.Point;

    ClearTexture();

    // emission map for glowing digits
    screen.GetComponent<Renderer>().material.SetTexture("_EmissionMap", drawableTexture);

    room = GetComponent<Room>();
    originalLightColor = mainLight.color;

    predictionText.text = "?";
}

void ClearTexture()
{
    drawableTexture.LoadRawTextureData(zeroes);
    drawableTexture.Apply();
}
Panel이 시작되면 drawableTexture를 새로 생성한다.
그리고 texture를 초기화해 준다.
LoadRawTextureData함수는 매개변수로 전달된 배열을 텍스처에 적용한다.
byte[] zeroes = new byte[imageWidth * imageWidth * 3]; // blank screenscreen.GetComponent<Renderer>().material.SetTexture("_EmissionMap", drawableTexture);초기화한 drawbleTexture를 screen의 emissionMap으로 적용한다.
즉, zeros는 모든 요소가 0이기 때문에 텍스처가 모두 0으로 적용될 것이고 검은색으로 보이게 된다.
초기화는 완료했고 마우스로 그림을 어떻게 그리는지 확인하려 했는데 Panel에서는 이를 감지하는 코드가 없었다.
살펴보니 MINSTEngine에서 감지하고 있었다.
void Update()
{
    if (Input.GetMouseButtonDown(0))
    {
        MouseClicked();
    }
    else if (Input.GetMouseButton(0))
    {
        MouseIsDown();
    }
}

// Detect the mouse click and send the info to the panel class
void MouseClicked()
{
    Ray ray = lookCamera.ScreenPointToRay(Input.mousePosition);
    if (Physics.Raycast(ray, out RaycastHit hit) && hit.collider.name == "Screen")
    {
        Panel panel = hit.collider.GetComponentInParent<Panel>();
        if (!panel) return;
        panel.ScreenMouseDown(hit);
    }
}

// Detect if the mouse is down and sent the info to the panel class
void MouseIsDown()
{
    Ray ray = lookCamera.ScreenPointToRay(Input.mousePosition);
    if (Physics.Raycast(ray, out RaycastHit hit) && hit.collider.name == "Screen")
    {
        Panel panel = hit.collider.GetComponentInParent<Panel>();
        if (!panel) return;
        panel.ScreenGetMouse(hit);
    }
}
카메라를 통해 ray를 쏘고 hit에서 panel을 읽어와 draw를 하는 것 같다.
두 가지 이벤트를 처리하는데 Click과 Down이벤트이다.
클릭하면 draw를 시작하고 down에서 경로를 트래킹해 화면에 출력하는 것 같다.
public void ScreenMouseDown(RaycastHit hit)
{
    if (Game.instance && Game.instance.mode != Game.MODE.CONTROL) return;
    Vector2 uv = hit.textureCoord;
    Vector3 coords = uv * imageWidth;
    lastCoord = coords;
    timeOfLastEntry = Time.time;
}

public void ScreenGetMouse(RaycastHit hit)
{
    if (Game.instance &&  Game.instance.mode != Game.MODE.CONTROL) return;
    Vector2 uv = hit.textureCoord;
    Vector3 coords = uv * imageWidth;

    DrawLine(lastCoord, coords);
    lastCoord = coords;
    drawableTexture.Apply();

    timeOfLastEntry = Time.time;
    // Run the inference every frame since it is very fast
    Infer();
}
hit결과에서 textureCoord를 받아와서 실제 coord를 계산한다.
그리고 DrawLine으로 선을 그린다.
void DrawLine(Vector3 startp, Vector3 endp)
{
    int steps = (int)((endp - startp).magnitude * 2 + 1);
    for(float a = 0; a <= steps; a++)
    {
        float t = a * 1f / steps;
        DrawPoint(startp * (1 - t) + endp * t , 2, Color.white);
    }
}
DrawLine은 시작점과 끝점을 여러 step으로 나누고 각 구간의 색을 DrawPoint 함수를 통해 변경한다.
void DrawPoint(Vector3 coord, int thickness, Color color)
{
    //clamp the values so it doesn't touch the border
    float x = Mathf.Clamp(coord.x, thickness, imageWidth - thickness);
    float y = Mathf.Clamp(coord.y, thickness, imageWidth - thickness);

    switch (thickness)
    {
        case 1:
            DrawPixel((int)x, (int)y, color);
            break;
        case 2:
        default:
            int x0 = Mathf.Max(0, (int)(x - 0.5f));
            int x1 = Mathf.Min(imageWidth - 1, (int)(x + 0.5f));
            int y0 = Mathf.Max(0, (int)(y - 0.5f));
            int y1 = Mathf.Min(imageWidth - 1, (int)(y + 0.5f));
            DrawPixel(x0, y0, color);
            DrawPixel(x1, y0, color);
            DrawPixel(x0, y1, color);
            DrawPixel(x1, y1, color);
            break;
    }
}
선의 두께에 따라 색이 칠해질 pixel을 계산하게 된다.
실질적으로 pixel의 색깔을 적용하는 함수는 DrawPixel이다.
void DrawPixel(int x,int y,Color color)
{
    drawableTexture.SetPixel(x, y, color);
}
검은색(0)으로 초기화했던 drawbleTexture를 white로 변경하게 되면 밑에 있던 텍스처가 보이게 된다.
패널의 경우 초기 텍스처가 초록색으로 설정되어 있고 drawbleTexture가 이를 덮고 있는 형태라 사실 실제로 선을 그리는 게 아니라 선으로 검은색을 지워내는 것과 동일하다.
선을 그리는 로직을 살펴봤으니 이를 MNIST를 통해 숫자로 인식하는 로직은 다음 포스트에서 알아보자.